


What if the key to a memorable Milky Way photograph in Namibia is less about complicated camera gear and more about choosing the right night? If you’re wondering how to capture the milky way in namibia, start with the sky: the galactic core is best viewed from June to August, with September also offering excellent opportunities. A new-moon period usually means darker conditions, but check moonrise and moonset too, since they affect how much of the night is free from moonlight.
It’s natural to feel unsure about timing, focusing in the dark or navigating after sunset. Preparing your location and camera setup in daylight can make the shoot more manageable. Namibia’s dark skies offer a remarkable setting to practise, but cloud, moonlight and nearby lights can all affect what your camera records.
This guide covers how to plan around lunar conditions, set up and focus your camera, and refine exposure with test frames. You’ll also find practical ways to prepare for a remote night shoot, whether you’re travelling independently or exploring with a guided expedition.
How Namibia’s dark skies and the right night shape a Milky Way photograph
Milky Way photography records the faint structure of our galaxy against the night sky, often with a landscape in the foreground. It’s a form of astrophotography, and it depends on gathering enough starlight for detail to register. When planning how to capture the milky way in namibia, look for a dark, clear sky: moonlight and artificial lights can reduce contrast, while cloud can obscure the galaxy altogether.
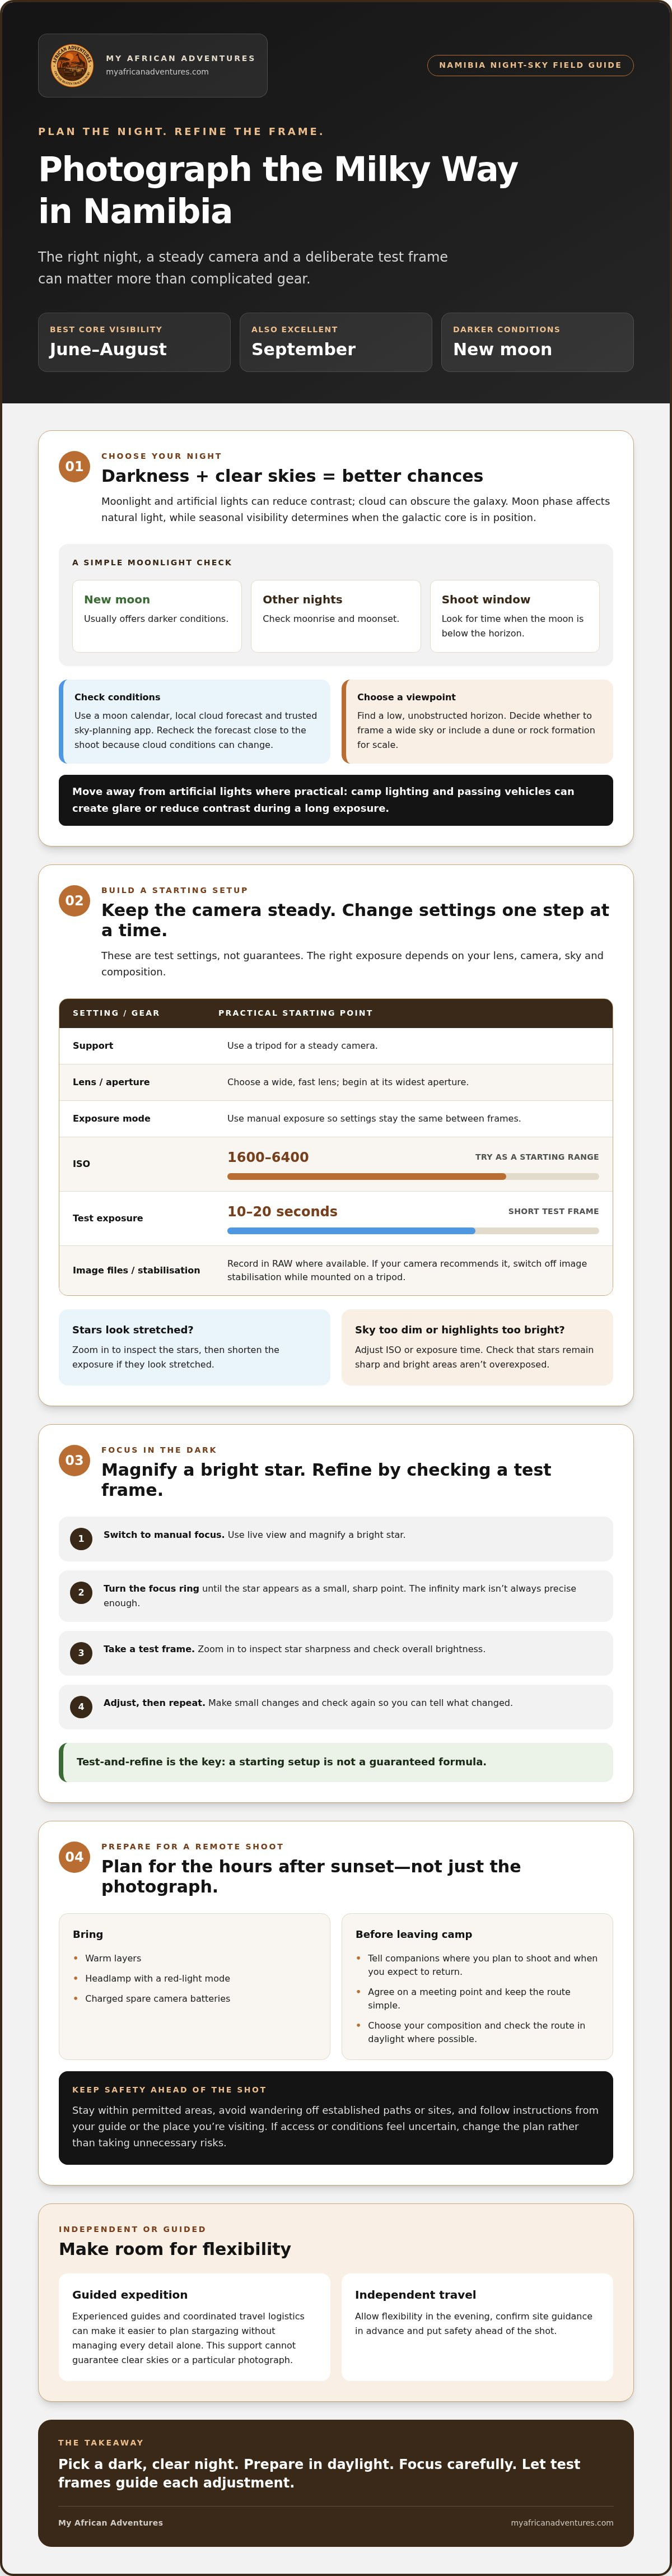
In Namibia, the galactic core is best viewed from June to August, with September also offering excellent opportunities. A new-moon period generally gives you darker conditions. On other nights, check moonrise and moonset to find a window when the moon is below the horizon. Moon phase affects natural light, darkness helps preserve faint detail, and seasonal visibility determines when the Milky Way’s core is in position.
How to choose a night and location for Namibia astrophotography
Check a moon calendar, a local cloud forecast and a trusted sky-planning app that shows when and where the galactic core will appear. Compare the forecast close to your shoot, since cloud conditions can change. For the composition, look for a low, unobstructed horizon so you have room to frame the galaxy above the landscape. Decide whether you want a wide view of the sky or a foreground feature, such as a dune or rock formation, to give the image a sense of scale.
Move away from artificial lights where practical. Camp lighting and passing vehicles can create glare or reduce contrast during a long exposure. Choose your viewpoint before dark and check that you can reach it safely without crossing unfamiliar ground at night. These checks are a practical foundation for how to capture the milky way in namibia. The Namibia night-sky photography guide offers broader planning ideas.
How to set up your camera and capture the Milky Way in Namibia
A steady camera and a deliberate test frame will do more for your first Milky Way image than changing several settings at once. Start with a tripod and a wide, fast lens. If your camera recommends switching off image stabilisation when it is mounted on a tripod, do so. Bring spare batteries, since long exposures and cold conditions can drain them, and record in RAW where available for greater flexibility when editing.
A practical starting setup is a tripod, a wide lens at its widest aperture, manual exposure, a high ISO and a short test exposure, followed by small adjustments based on the image. These are starting points, not guarantees. The right exposure depends on your lens, camera, sky and composition.
What camera settings and focus method should beginners try first?
Set exposure mode to manual so the camera keeps the same settings between frames. Try the widest aperture your lens allows, then begin with an ISO around 1600 to 6400 and a short exposure of roughly 10 to 20 seconds. Treat these as test settings rather than a formula. If stars look stretched when you zoom in, shorten the exposure. If the sky looks too dim, adjust the ISO or exposure time, while checking that the stars remain sharp and bright areas aren’t overexposed.
Focus manually. In live view, magnify a bright star and turn the focus ring until it appears as a small, sharp point. The infinity mark isn’t always precise enough. Take a test frame, then zoom in to inspect star sharpness and check the overall brightness. Repeat after each adjustment so you can tell what changed. This patient test-and-refine process is central to how to capture the milky way in namibia, whatever camera body you use. NaDEET recognizes a dark-sky reserve for one of the world's best views of the night sky, a reminder of the value of dark conditions, though careful focus still matters.
If you’d rather concentrate on the sky than coordinate every part of a remote trip, consider a guided Namibia photography expedition that includes stargazing.
Plan a safe Namibia night shoot and make the most of your expedition
A remote night shoot is more rewarding when you’ve prepared for the hours after sunset, not just the photograph. Pack warm layers, a headlamp with a red-light mode and charged spare camera batteries. Before leaving your accommodation or camp, tell your companions where you plan to shoot and when you expect to return. Agree on a meeting point and keep your route simple, since darkness can make even familiar ground harder to navigate.
Good preparation protects both the photographer and the experience, helping you stay safe while giving the landscape and night sky the attention they deserve. Choose your composition and check the route in daylight where possible. Stay within permitted areas, avoid wandering off established paths or sites, and follow instructions from your guide or the place you’re visiting. If access or conditions feel uncertain, change the plan rather than taking unnecessary risks for a frame.
How guided overlanding can support a night-sky photography plan
On a guided expedition, experienced guides and coordinated travel logistics can make it easier to plan time for stargazing without managing every detail alone. This support can reduce planning demands, but it can’t guarantee clear skies or a particular photograph. Independent travellers can use the same approach: allow flexibility in the evening, confirm site guidance in advance and put safety ahead of the shot.
For a sense of the quiet scale of a desert night, read The Guardian’s account of Namibia’s breathtaking landscape. You can also explore the existing Namibia photography expedition and stargazing tour articles for broader trip-planning ideas. Whether you travel independently or with a guide, a considered plan leaves room to enjoy the stars, not just photograph them.
Turn your Namibia night-sky plans into photographs
Learning how to capture the milky way in namibia starts with three choices: pick a night when the galactic core is visible, steady your camera and refine exposure through test frames, then prepare carefully for the setting. The best photograph is only part of the reward. Give yourself time to look up, enjoy the quiet and experience the landscape beyond the viewfinder.
If you’d like help coordinating the journey, My African Adventures offers guided premium 4x4 expeditions with fully serviced camping and professional logistics, alongside photography-focused routes and stargazing experiences. These guided trips can help you build time beneath the night sky into a wider Namibia adventure, while leaving you free to learn your camera and make your own photographs.
Explore guided Namibia overlanding adventures and start planning a trip that leaves room for both the photograph and the experience of the night sky.
Frequently Asked Questions
When is the Milky Way visible in Namibia?
The Milky Way’s visibility in Namibia changes with the season, time of night and lunar conditions. The galactic core is best viewed from June to August, with September also offering excellent opportunities, but this isn’t a guarantee for any particular night. Check a current astronomy calendar for timing and direction, then consult a local cloud forecast before travelling. The Milky Way may be visible outside the core’s prime viewing period, but its brightest region won’t always be well placed.
Can you photograph the Milky Way in Namibia with a phone?
Yes, some phones have night modes or manual controls that can record the Milky Way, though results depend on the device, darkness and how steadily it’s held. To capture the milky way in namibia with a phone, secure it on a stable support and take a test image to assess detail and brightness. Set realistic expectations: a camera with manual exposure generally offers more control over focus, exposure and image quality.
What camera settings should I use to photograph the Milky Way?
Begin with a wide aperture, manual focus, a high ISO and a short test exposure. These are starting points, not fixed settings: the best adjustments depend on your lens, sensor, sky brightness and whether you want stars to appear as points. After each test frame, zoom in to check sharpness and look for over-bright areas. Adjust exposure time or ISO gradually, then review the next frame before settling on a setup.
Do I need a special lens to capture the Milky Way in Namibia?
No, a special lens isn’t essential to begin, though a wide-angle lens with a relatively wide maximum aperture can gather more light and include more of the sky. Use the equipment you have, secure your camera on a tripod and focus carefully. A slower or narrower lens may need different exposure choices, and image detail may vary. Take test frames and refine them rather than expecting one setting to suit every lens.